Creating an RTF Mail Merge Document
First you will need to create a template for how you want your form to look. Just leave empty spaces where you want the data that is pulled from New World ERP to print. Once your template has been created follow the steps below to add the appropriate fields to your mail merge document that you will require to print.
Download the applicable sample template from New World. Your options for Permitting and Code Enforcement will be a “permit form letter”, “permit”, “permit application approval letter”, “permit application denial letter”, “Certificate of occupancy”, temporary certificate of occupancy”, “inspection confirmation letter”(this is used for any type of inspection”, or “case form letter”(this is used strictly for code cases). All are Rich Text Format (RTF) forms. Follow the path below in New World to download your sample templates.
Maintenance>new world ERP Suite>System>Mail Merge Templates
The page will default to the “sample templates” page in the mail merge templates drop down. Click on the form you need to create and save the template to your desktop.
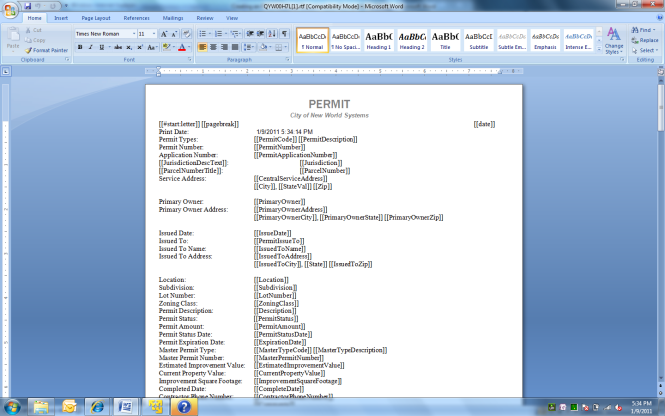
Once you open your form you’ll see all the available fields you are able to print. Choose the appropriate field that you wish to copy over to your form. This example uses the “Permit Number” on the Permit template to add data to a Permit Form. Ensure that when you highlight your field you ONLY highlight the text for that field. Right click with your mouse over the text and click “Copy”:
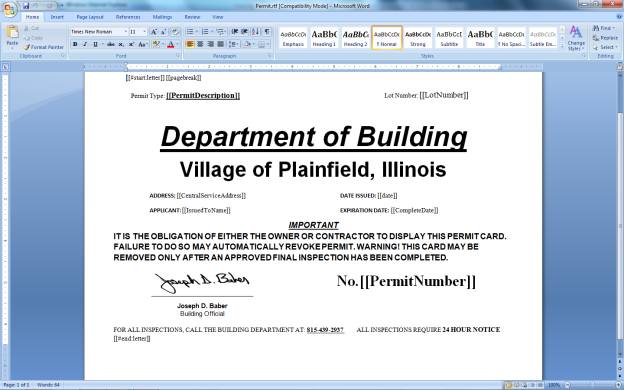
Open the template of the form you are creating and paste the field into the form:
Once you have copied all the text fields into your document you are then ready to save your file. Once again all of your mail merge documents in permitting and code enforcement must be saved in the RTF format mentioned above.
Once you have the form you wish to load into your system navigate back to the mail merge templates section by following the path below:
Maintenance>new world ERP Suite>System>Mail Merge Templates
Once you have arrived at the appropriate screen you will see that there is a drop-down menu that shows you that you are on the “sample templates” page.
If you open up this drop-down menu you will see that there is one option in the drop-down menu for each sample template available on your current screen.
For this example we will be loading a Permit into the system. Navigate to the section for Permits. Once you make your selection you will see all the permit forms that are currently loaded into the system.
At the bottom of the page you have various options you can select in regards to your files. Click New to load in a new form.
Once you click new you will see a pop up window that will allow you to search for your form on your hard drive.
Chose the File Type (for permits and code enforcement this will always be RTF), Description (this is the name you want the form to be known as in the system), and choose the file from your hard drive. Click ok to add your form to the list that you already see.
After you have loaded your form into the system you must complete the below steps before it can be used. Using the buttons at the bottom of the page you must complete in these in this order.
- Click “check in”
- Click ok in the check in pop up window
- Click finalize
- Click permissions and add permissions to those that will be using the form
Depending on which form you are using you may have to link it to the permit it applies to. In your permit edit screen you will see that you must designate the permit, certificate of completion, temporary certificate of completion, application approval, and denial letters to the individual permit type.
When creating RTF forms it is often difficult to gauge how much space will be needed in the template for that data that will be produced from New World. Follow the steps below as an easy way to prevent your template data from being pushed around on the form when printing RTF documents:
-
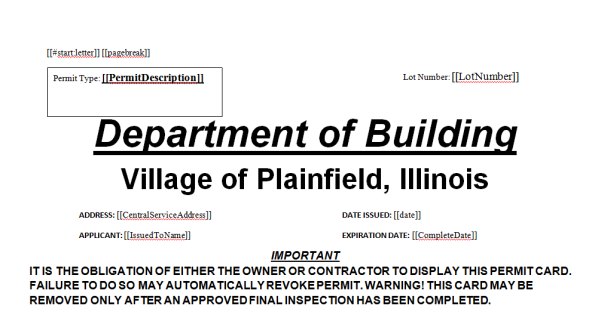
When inserting your text fields into the applicable template insert them into a text box as shown below. It will be easier to control the format of the document if you can keep the applicable data fields where they are placed on the form:
-
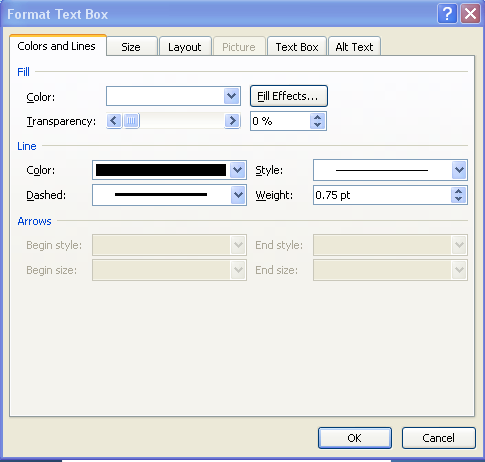
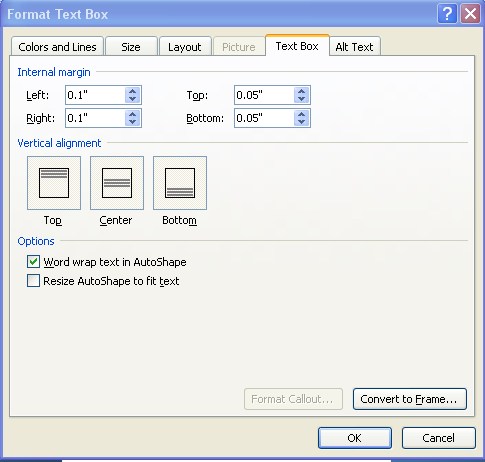
Once you have placed the hyperlink in the text box hover over the text box borders with your mouse until your mouse arrow turns into a cross. Right click on the border and click “edit text box”. The pop-up below will appear. When it does set your color and line parameters for the box:
-
Click on the “text box” tab. On this tab you will choose whether or not you want your text box to expand horizontally or vertically once it fills with data. If you want it to expand horizontally uncheck the “word wrap text AutoShape” option and check the “resize AutoShape to fit text” option:
-
Once you have formatted the text box you can then lock it in place. To do this, proceed to the “text box tools” menu (the location of the text box tools will vary from Word2003-Word2007). In word 2007 if you have selected the text box with your cursor you will be able to select the “text box tools” on the top menu bar. It will appear as a shaded option above the regular toolbar:
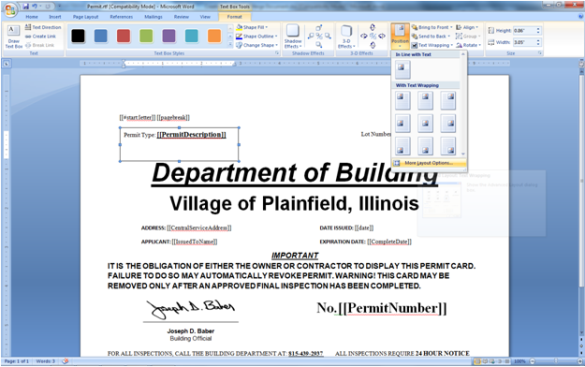
Once their select the “position” option and navigate to “more layout options. Another pop-up box will then appear.
-
Once the Advanced Layout text box appears you will see two tabs. In the first you will define where your text box will stay in relation to the page. If you want your text box to stay exactly where it is on the page(as is the case typically when you create a LICENSE RENEWAL) then in the Horizontal section select “Page” in the right hand drop down menu. Do the same in the vertical “below” drop down menu:
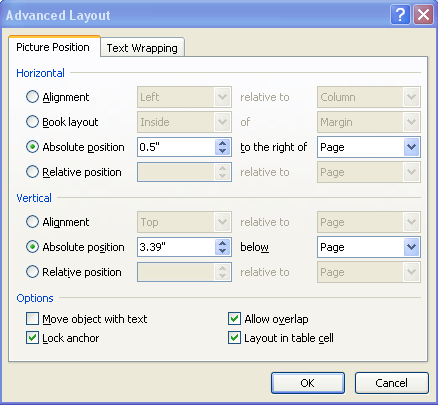
To lock your text box in place choose “Lock Anchor” at the bottom left of the text box.